
Building a new home or commercial structure is an exciting journey that begins long before the first piece of lumber is cut or the first brick is laid. While the architectural designs, interior finishes, and landscaping often steal the spotlight, the true success of any building project lies hidden entirely beneath the surface. A structure is only as strong, stable, and enduring as the earth it rests upon. If you skip vital steps during the initial site preparation phase, you are setting the stage for budget blowouts, structural failures, and endless headaches down the line.
Many property owners severely underestimate the immense complexity of transforming raw land, or even a teardown lot, into a site that is genuinely ready for builders to take over. It is not simply a matter of moving some dirt around and pouring a concrete slab. Site preparation is a highly technical sequence of assessments, environmental controls, and precise earthmoving that sets the literal foundation for everything that follows. When the ground is improperly prepped, buildings settle unevenly, foundations crack, driveways wash away in the rain, and underground utilities fail.
This guide serves as your comprehensive, step-by-step roadmap to property preparation. We will walk you through the entire lifecycle of getting your land ready for the framing crews, covering every critical stage from the initial legal surveys to the final soil compaction. Whether you are building a quaint suburban home, a sprawling rural retreat, or a new commercial facility, mastering these foundational steps will save you time, money, and immense stress.
By understanding the mechanics of site preparation, you will be better equipped to communicate with your builders, understand the timeline, and ensure that your dream project starts on the most solid footing possible. Let us dive into the critical phases of turning your raw property into a perfectly prepped canvas for construction.
Phase 1: Initial Site Assessment and Boundary Planning

Before a single shovel touches the earth, your property must undergo a rigorous assessment. This phase is entirely analytical and legal, ensuring that your envisioned project is viable, permitted, and safely executed within the confines of the law. Skipping this phase is akin to navigating a minefield blindfolded; the risks are simply too high.
Survey the Property Lines Strictly
One of the most catastrophic mistakes a property owner can make is assuming they know exactly where their property lines end and begin based on old fences, tree lines, or neighborhood assumptions. Hiring a licensed, professional surveyor is a non-negotiable first step. They will use advanced GPS and optical instruments to pinpoint the exact boundaries of your parcel according to county or municipal records.
-
Preventing Encroachment: A precise survey ensures your new driveway, retaining walls, or the building itself does not accidentally cross over into a neighbor’s yard. Boundary disputes can lead to bitter legal battles and court orders forcing you to tear down newly built structures.
-
Understanding Setbacks: Every municipality has specific zoning laws known as “setbacks.” These dictate exactly how far your building must be from the front, back, and side property lines. A surveyor maps these invisible boundaries so your architect and builder know the exact buildable footprint of the lot.
-
Identifying Easements: Your property may have legal easements—strips of land that utility companies or the city have the right to access. You generally cannot build permanent structures over easements, and knowing their location early prevents you from designing a house over a major municipal sewer line.
-
Topographical Mapping: For sloping or uneven lots, a surveyor can provide a topographical map showing the exact elevations and contours of the land. This is essential data for planning how water will drain off the property and calculating how much dirt needs to be added or removed later on.
Identify and Map Underground Utilities Early
If your property is a teardown lot in an established neighborhood, or even seemingly raw land near a road, there is a high probability that an invisible network of pipes and wires runs beneath the surface. You must account for these before any digging begins.
-
The Utility Locate Process: In most regions, there is a centralized number you can call (such as 811 in the United States) to request utility locating. This is typically a free public service where representatives from the gas, water, electric, and telecommunications companies come to your property and spray-paint color-coded lines on the ground to indicate the path of underground lines.
-
Preventing Catastrophe: Striking a buried high-voltage electrical line can be fatal. Hitting a pressurized gas main can cause devastating explosions and force neighborhood evacuations. Even severing a fiber-optic internet cable can result in tens of thousands of dollars in fines and repair bills billed directly to you.
-
Planning Connections: Mapping existing utilities is not just about avoiding danger; it is also about planning your new connections. Knowing exactly where the municipal water main or the electrical transformer is located allows you to plan the shortest, most cost-effective routes for connecting your new building to the grid.
Phase 2: Removing Trees, Brush, and Surface Obstacles
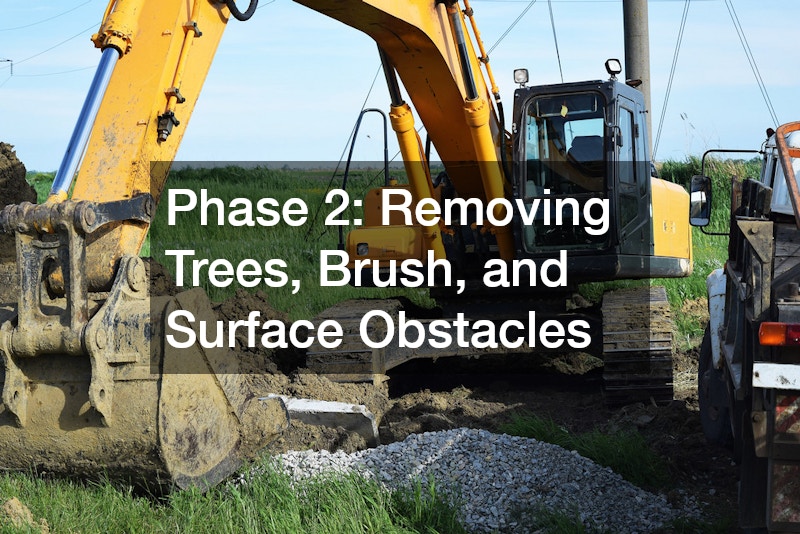
Once the invisible lines and legal boundaries are clearly established, the physical transformation of the property begins. This phase involves stripping away the natural or overgrown obstacles that stand in the way of the building pad, access routes, and staging areas.
Tag Trees for Preservation vs. Removal
Not every piece of vegetation needs to be bulldozed. Mature trees can add immense aesthetic and financial value to your finished property, providing natural shade, windbreaks, and instant landscaping appeal. However, protecting them during construction requires deliberate planning.
-
Walk the Lot with Experts: Take the time to walk the property with your builder and potentially a certified arborist. Use bright surveyor’s ribbon to clearly tag the trees you want to preserve. Ensure all workers on the site know that these flagged trees are strictly off-limits.
-
Establish Root Protection Zones: A tree’s root system often extends far beyond its visible canopy. If heavy machinery repeatedly drives over the root zone, it will compact the soil, suffocating the roots and slowly killing the tree. You must set up physical barricades around preserved trees to keep traffic away.
-
Assess Danger Trees: Any tree that is dead, diseased, or leaning precariously toward the future building site must come down. Even healthy trees might need to be removed if their root systems threaten to crack the future foundation or if they block essential access routes for delivery trucks. When dealing with heavily wooded lots, bringing in professional land clearing services is usually the safest and most efficient route, as they have the specialized gear to bring down large timber safely without damaging the surrounding environment.
Eradicate Invasive Root Systems Completely
Cutting a tree down to a stump is only half the battle. What remains beneath the soil is just as critical, if not more so, for the future stability of your construction project.
-
The Danger of Rotting Roots: If you leave large stumps and extensive root networks buried within the footprint of your future foundation, those organic materials will eventually decompose and rot away. As they disintegrate, they leave hidden voids in the earth. The weight of your building will eventually cause the soil above these voids to collapse, leading to a cracked, sinking foundation.
-
Grinding vs. Pulling: While stump grinding is fine for landscaping areas, it is entirely insufficient for the actual building pad. The entire stump and the main root ball must be physically pulled out of the earth.
-
Deep Soil Cleaning: For lots covered in dense, invasive brush or old orchards, the earth must be thoroughly combed. Providers of professional lot clearing services utilize specialized heavy machinery with root-rake attachments to sift through the top layer of soil, ripping out organic debris and ensuring the earth is clean, stable, and ready to bear the immense weight of a new building.
Phase 3: Managing Existing Structures and Heavy Debris

If your property is not a pristine, untouched piece of wilderness, you will likely have to deal with man-made obstacles. Old structures, hidden concrete pads, and accumulated debris must be carefully managed to ensure a safe, efficient workspace for the upcoming construction phases.
Tear Down Unsafe Outbuildings Safely
Many purchased properties come with dilapidated sheds, rotting barns, collapsing fences, or even the remnants of a previous house that recently burned down or was abandoned. These structures cannot simply be pushed over and buried.
-
Hazardous Material Inspections: Before dismantling any old structure built before the 1980s, you must have it tested for hazardous materials. Asbestos in old floor tiles or roof shingles, and lead in old paint, require specialized removal teams and strict adherence to environmental disposal regulations.
-
Structural Demolition: Taking down an old building requires a strategic approach to prevent sudden collapses. While a homeowner might safely dismantle a small wooden garden shed with hand tools, taking down a two-story barn or a cinderblock garage requires serious power. This is where securing heavy equipment rental becomes incredibly useful. Renting a mid-sized tracked loader or an excavator with a demolition grapple allows you to safely pull down walls, rip up old concrete slabs, and load the heavy debris into trucks without risking severe personal injury.
-
Salvaging Materials: Before total destruction, consider what can be saved. Old-growth timber from a barn, antique bricks, or salvageable metal roofing can often be reclaimed, sold, or repurposed into the new home to add unique, historical character.
Set Up a Dedicated Waste Management Zone
Construction and demolition generate a staggering amount of waste. If this debris is not managed from day one, your property will quickly turn into a chaotic, hazardous junkyard that slows down workers and invites accidents.
-
Strategic Dumpster Placement: Work with the teams you hire, such as local excavating companies, to determine the best location for large roll-off dumpsters. They should be placed near the demolition or building site for easy tossing, but far enough away that they do not block delivery trucks or the flow of heavy machinery.
-
Sorting for Cost Efficiency: Do not just throw everything into one massive pile. Mixing toxic materials, concrete, green waste (branches and roots), and general trash will result in exorbitant landfill fees. Set up distinct zones or separate bins. Clean concrete and asphalt can often be hauled to recycling centers for a fraction of the cost of a general landfill.
-
Daily Cleanup Protocols: Enforce a strict daily cleanup routine. Loose nails, shattered glass, and splintered wood are severe hazards for workers and heavy machinery tires. Maintaining a clean site is the hallmark of a professionally run, efficient construction project.
Phase 4: Leveling the Ground and Establishing Drainage Paths
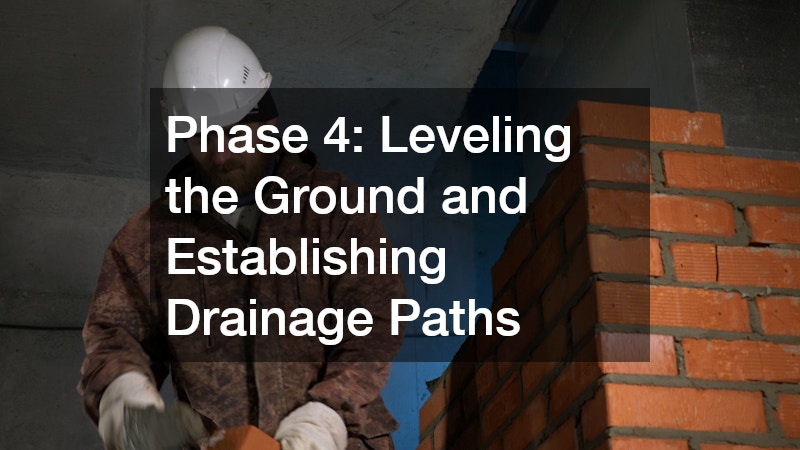
With the surface cleared of trees, roots, and old structures, the focus shifts to the shape and density of the earth itself. The goal of this phase is to sculpt the property so that it handles water correctly and provides a rock-solid, perfectly leveled base for the foundation.
Slope the Earth Away from the Future Foundation
Water is the absolute worst enemy of any building. If rainwater or melting snow is allowed to flow toward your new home, it will pool around the foundation, causing hydrostatic pressure that forces moisture through concrete, floods basements, and slowly deteriorates the structure.
-
The Principle of Positive Drainage: The earth must be reshaped so that it slopes downward, away from the house in every direction. The general rule of thumb in the building industry is a drop of at least six inches within the first ten feet away from the foundation perimeter.
-
Creating Swales and Berms: Sometimes, naturally sloping lots funnel water directly toward your building site. In these cases, the earth must be carved to intercept the water. Professionals, such as experienced grading contractors, use precise laser levels and bulldozers to create swales (shallow, wide drainage ditches) that catch runoff from higher elevations and safely redirect it around the sides of the house and out toward the street or a designated drainage basin.
-
Subsurface Drainage Systems: In areas with heavy rainfall or high water tables, surface sloping is not enough. You may need to install French drains—trenches filled with gravel and perforated pipes—to capture underground water and channel it safely away from the building pad.
Compact the Site to Prevent Future Settling
When dirt is moved, scraped, or added to a site (known as “fill dirt”), it becomes loose and airy. If you pour a heavy concrete foundation on top of uncompacted fill dirt, the sheer weight of the house will cause the soil to compress unevenly over time, leading to catastrophic foundation cracking.
-
The Process of Lifts: Compaction is a highly scientific process. You cannot dump ten feet of loose dirt into a hole and simply drive a tractor over it. The soil must be added in thin layers, known as “lifts,” usually only 6 to 12 inches thick at a time.
-
Moisture Control: Soil has an optimal moisture content for compaction. If it is too dry, it turns to dust and won’t bind. If it is too wet, it turns to mud and simply squishes around. The dirt must be conditioned with water trucks or allowed to dry out in the sun to reach the perfect consistency.
-
Heavy Compaction Machinery: Each lift is subjected to immense pressure and vibration. Depending on the soil type, providers of professional excavating services will use massive smooth-drum vibratory rollers for granular soils (like sand and gravel) or specialized “sheepsfoot” rollers equipped with heavy metal studs to knead and compact cohesive soils (like clay) until the ground meets the strict density requirements engineered for your specific building.
Phase 5: Trenching for Utilities and Digging the Foundation
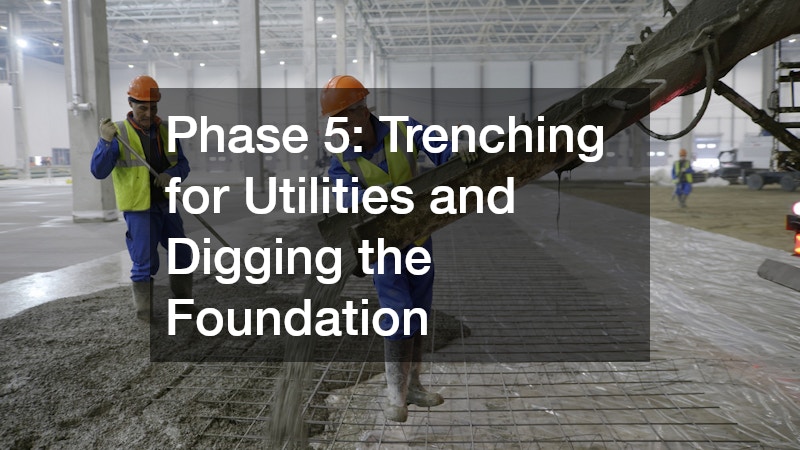
With the site cleared, leveled, and properly draining, it is time to dig the vital pathways that will connect your home to the modern world, as well as the deep trenches that will anchor the structure to the earth. This phase demands extreme precision.
Dig Precise Trenches for Water and Power Lines
Before the foundation is poured, the supply lines for water, electricity, gas, sewer, and telecommunications must be trenched from the street or the property edge directly into the footprint of the future house.
-
Navigating Depth Codes: Utility trenches are not arbitrary ditches; they are heavily regulated by local building codes. Water lines must be buried deep enough to stay below the regional frost line so they do not freeze and burst in the winter. Electrical conduits and gas lines have their own strict depth requirements to protect them from future landscaping or gardening accidents.
-
Bedding and Backfilling: Pipes and wires cannot simply be thrown onto sharp rocks at the bottom of a trench. They must be carefully bedded in soft sand or fine gravel to protect them from abrasion. Once the lines are laid, a brightly colored warning tape is usually buried a few inches above the pipes so future diggers are alerted before they strike the actual utility.
-
Efficiency in Routing: Strategic planning is vital here. Reputable excavating contractors will plan the most direct, efficient routes for these trenches, minimizing the disruption to the lot and ensuring that different utilities maintain the required legal separation distances from one another.
Carve Out the Exact Dimensions for Your Footings
The foundation is the anchor of your entire project, and its success relies entirely on the accuracy of the dig. Whether you are pouring a concrete slab, building a crawlspace, or excavating a full basement, the earth must be removed with mathematical precision.
-
Following the Blueprints: The operators running the heavy machinery must dig to the exact width, length, and depth specified by the structural engineer’s blueprints. Over-digging wastes money on extra concrete to fill the mistake, while under-digging compromises the structural integrity of the home.
-
Reaching Load-Bearing Soil: The bottom of the foundation trenches, where the concrete footings will be poured, must rest on “undisturbed” soil that is capable of bearing the immense load of the house. If the soil at the specified depth is soft, organic, or unstable, the dig must continue deeper until solid, load-bearing earth is reached.
-
Creating Clean Profiles: The walls of the foundation hole must be carved cleanly and safely to prevent cave-ins while the concrete workers are down in the trenches setting up forms and rebar. This level of precise, deep earthmoving is why hiring specialized excavation companies with experienced operators and modern, laser-guided machinery is so critical to the success of the build.
Phase 6: Finalizing Site Stability and Access Roads
The major earthwork is complete, the trenches are dug, and the site is nearly ready for the builders. However, the raw, exposed earth is now highly vulnerable to the elements and the heavy traffic of upcoming construction crews. You must stabilize the site to maintain safety and environmental compliance.
Build a Temporary Gravel Driveway for Construction Traffic
The moment construction officially begins, your property will be bombarded by a relentless parade of heavy vehicles. Concrete mixer trucks, flatbeds delivering massive loads of lumber, and crews of workers in pickup trucks will be arriving daily. Raw dirt cannot handle this abuse.
-
Preventing the Mud Trap: If it rains on an unpaved, unstabilized dirt lot, heavy trucks will immediately sink to their axles. A stuck concrete truck can ruin an entire day’s pour and cost thousands of dollars in delays and towing fees.
-
Laying the Tracking Pad: To prevent this, you must install a temporary construction entrance, often called a “tracking pad.” This typically involves laying down a heavy-duty geotextile fabric over the primary access route and covering it with a very thick layer of coarse, crushed rock (usually 2-inch to 3-inch stone).
-
Keeping Public Roads Clean: A gravel driveway serves a secondary, legal purpose. As muddy trucks drive over the coarse rock, the stones knock the mud out of their tire treads before they pull onto the public street. Local municipalities will quickly issue hefty fines to any homeowner or excavation contractors caught tracking thick, dangerous mud onto public asphalt.
Install Erosion Control Measures Around the Perimeter
When you clear land and reshape the soil, you remove the natural grasses and roots that hold the earth in place. Without protection, a single heavy rainstorm can wash tons of your carefully graded topsoil away, clogging local storm drains and polluting nearby streams.
-
Silt Fences and Straw Wattles: To maintain environmental compliance, you must install physical barriers around the downward-sloping perimeters of your property. Silt fences (black, porous fabric stretched across wooden stakes) and straw wattles (long tubes filled with compacted straw) act as filters. They allow rainwater to pass through while trapping the loose sediment on your property.
-
Protecting Soil Piles: If you have piles of topsoil saved for future landscaping, they must be covered with heavy plastic tarps or temporarily seeded with fast-growing grass to prevent wind and rain erosion.
-
Stormwater Prevention Plans: For larger projects or lots near bodies of water, local environmental agencies may require a formal Stormwater Pollution Prevention Plan (SWPPP). Failing to implement and maintain these simple erosion controls is a quick way for a municipal inspector to shut your entire project down. A thorough, detail-oriented excavation company will ensure these protective measures are installed correctly before they demobilize their heavy machinery from your site.
Conclusion
Turning a piece of raw land or an overgrown lot into a pristine, build-ready pad is undoubtedly the messiest, most chaotic, and least glamorous part of building a new home. There are no paint swatches to choose from, no gleaming countertops to admire, and no exciting design reveals. It is a process defined by mud, noise, heavy machinery, and strict adherence to technical engineering principles.
However, this unglamorous phase is arguably the single most critical investment you will make in the entire lifespan of your property. By accurately mapping your boundaries, thoroughly removing hidden subterranean hazards, carefully managing water runoff, and carving out a hyper-precise footprint for your foundation, you are guaranteeing the structural integrity of your future home. When the earth is properly prepared, walls remain straight, basements stay bone-dry, and the building stands resilient against the test of time.
Do not let the excitement of vertical construction tempt you into rushing the groundwork. Take the time now to pull out your blueprints, walk your property with a critical eye, and begin organizing your site preparation timeline. Your dream home deserves to be built on the strongest foundation possible, and that foundation begins with the dirt.